
Conversion Tracking
Method 1: Pixel Tracking
A tracking pixel is a piece of HTML that loads when a user visits a site. It is essentially an image with 1x1 dimensions that users will not see.
You can use pixel tracking to track the performance of your campaigns. Placing a tracking pixel tag in the body of a specific page(s) that you want to track e.g.(sign-up, sale) allows the system to re-target these potential customers when they browse other websites.
For example, you could create 3 tracking pixels in three locations to get highly objective results:
- Tracking pixel n°1 on the landing pages.
- Tracking pixel n°2 on the free sign-up page.
- Tracking pixel n°3 on the payment confirmation page.
The Benefits of Pixel Tracking
Pixel tracking allows you to:
Track sales by campaign, ad creative, traffic source, and much more.
Use behavioural retargeting to create a higher volume of well targeted ads.
Check the performance of each banner (CTR, Conversions, etc.) and determine the best method of promotion to use.
Using a tracking pixel
![]()
- To create a tracking pixel, from the main screen of the Admin Panel, click Campaigns > Conversion Tracking.
- Click the NEW GOAL button.
- The New Goal dialog box will appear.
- Set a Name for the goal that will enable you to recognise it easily.
- Choose an Order number for it:
Order number and goals
The Order number sets which goal this tracking pixel corresponds to:
For example, if you set the order as 2, this tracking pixel will correspond to goal G2 when you are viewing goals in the Statistics page.
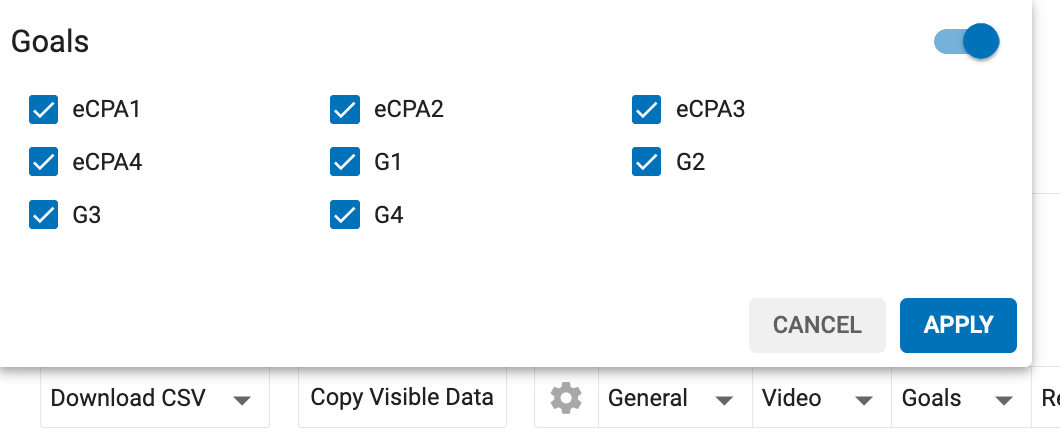
As you create tracking pixels and set their order, more goals will be created in the system to correspond to them. So if you create 4 tracking pixels and order them 1 to 4, there will be 4 goals, G1 to G4.
When in the Statistics page, there will also be an eCPA (Effective Cost Per Acquisition) for each of these goals, which you can choose to show in the Goals section of the table data.
The eCPA is the cost of the campaign divided by the number of conversions. It shows you how much are spending to achieve conversion of that goal.

If you wish, you can then set a Cost of Acquisition for the goal.
Cost of Acquisition
The Cost of Acquisition is the maximum amount you can afford to pay for the conversion of that goal.

For example, if your goal represents a completed signup to your portal, you would calculate how much money you make on average from a signed up user, depending on how long they stay signed up, their membership fee and so on.
From this, you know the maximum amount you would be willing to spend to get a user to sign up.
If you enter this figure into the Cost of Acquisition field, you can use it to keep track of how much you are spending on conversions of this goal.
As mentioned above, when you view the Statistics tab, you will see your goals and their associated eCPA in the table data.
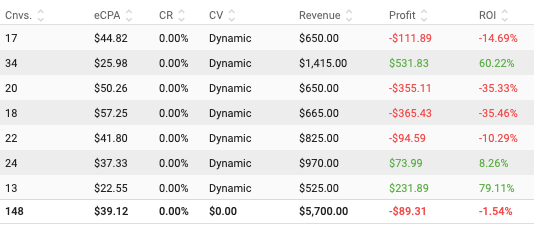
Once you have set up a Cost of Acquisition, the eCPA will appear in 3 different colours:
- The number is GREEN : ROI 100% and more. Your return on investment is positive and you are paying less for each conversion than your COA.
- The number is ORANGE : ROI of 50% to 99%. Your return on investment is almost OK. Check the detailed statistics of the campaign to improve some sources of traffic.
- The number is RED : ROI 1% to 49%. Your return on investment is negative and you are paying more for each conversion than you can afford (more than your COA). Check the sources of traffic and your campaign setup for errors.
Method 2: API Tracking
Alternatively, you can track conversion via API (Server to Server). To do this, follow the steps below:
Step 1: Goal Setup
You must have at least one conversion goal setup in order to track with API. These are generated via the Conversion Tracking tab using the same steps as above. A html code will be generated automatically:
<script type="text/javascript"src="http://syndication.example.com/tag.php?goal=d82c8d1619ad8176d665453cfb2e3s5f0">
The above html code can be used either for API or for pixel tracking. For tracking through an API you only need to use the Goal ID. The Goal ID is the value found in the tag after "goal=". In the tag above, the Goal ID is 'd82c8d1619ad8176d665453cfb2e3s5f0'.
Step 2. Tracker Parameter
The system will pass a dynamic tracker to the Advertiser's URLs which identifies each click uniquely. This tracker must be stored on the Advertiser's side, and sent to the API if a visitor is generating a conversion.
To receive this tracker, you must use the dynamic tag {conversions_tracking} in the URLs of the campaigns.
Example:
http://www.yoursite.com/?lng=FR&exotracker={conversions_tracking} with {conversions_tracking} replaced dynamically by a unique string in the Advertiser's server's data.
Therefore once this URL is triggered it will replace the values on the param as follows:
From:
http://www.yoursite.com/?lng=FR&exotracker={conversions_tracking}
To:
http://www.yoursite.com/?lng=FR&exotracker=ooddNHNPXHRbHNNU7TG9yZW0gaXBzdW0gZG9sb3Igc2l0IGFtZXQsIGNvbnNlY3RldHVyIGFkaXBpc2NpbmcgZWxpdC4gVml2YW11cyBub24gb2RpbyBtYXNzYS4gRG9uZWMgZGlnbmlzc2ltIGJsYW5kaXQgdmVsaXQgYXQgZWdlc3Rhcy4=
It must get and store the value obtained on the exotracker param on the advertiser's side, and send it back to the API if that visitor is generating a conversion.
This value needs to be sent back in the postback:
"ooddNHNPXHRbHNNU7TG9yZW0gaXBzdW0gZG9sb3Igc2l0IGFtZXQsIGNvbnNlY3RldHVyIGFkaXBpc2NpbmcgZWxpdC4gVml2YW11cyBub24gb2RpbyBtYXNzYS4gRG9uZWMgZGlnbmlzc2ltIGJsYW5kaXQgdmVsaXQgYXQgZWdlc3Rhcy4="
Note: The {conversions_tracking} will generate a string of characters (Minimum length 150 characters, maximum 700 characters) so the advertiser needs to ensure they are able to receive and return the complete string.
Step 3: Postback URL
Finally, it must notify the system through the Postback URL each time a tracker is generating a conversion. To do so, it needs to call the tracking API:
http://syndication.example.com/tag.php?goal=[GOAL_ID]&tag=[TRACKER]
Therefore, the postback will look like this:
From:
http://syndication.example.com/tag.php?goal=GOAL_ID&tag={exotracker}
To:
https://syndication.example.com/tag.php?goal=d82c8d1619ad8176d665453cfb2e3s5f0&tag=ooddNHNPXHRbHNNU7TG9yZW0gaXBzdW0gZG9sb3Igc2l0IGFtZXQsIGNvbnNlY3RldHVyIGFkaXBpc2NpbmcgZWxpdC4gVml2YW11cyBub24gb2RpbyBtYXNzYS4gRG9uZWMgZGlnbmlzc2ltIGJsYW5kaXQgdmVsaXQgYXQgZWdlc3Rhcy4=
- Where the tracker from step 2 is:
d82c8d1619ad8176d665453cfb2e3s5f0&tag=ooddNHNPXHRbHNNU7TG9yZW0gaXBzdW0gZG9sb3Igc2l0IGFtZXQsIGNvbnNlY3RldHVyIGFkaXBpc2NpbmcgZWxpdC4gVml2YW11cyBub24gb2RpbyBtYXNzYS4gRG9uZWMgZGlnbmlzc2ltIGJsYW5kaXQgdmVsaXQgYXQgZWdlc3Rhcy4
GOAL_ID must be replaced by the goal ID (d82c8d1619ad8176d665453cfb2e3s5f0) provided when the conversion goal is created.
{exotracker} must be replaced by the unique string received dynamically by the advertiser's servers:
(ooddNHNPXHRbHNNU7TG9yZW0gaXBzdW0gZG9sb3Igc2l0IGFtZXQsIGNvbnNlY3RldHVyIGFkaXBpc2NpbmcgZWxpdC4gVml2YW11cyBub24gb2RpbyBtYXNzYS4gRG9uZWMgZGlnbmlzc2ltIGJsYW5kaXQgdmVsaXQgYXQgZWdlc3Rhcy4=)